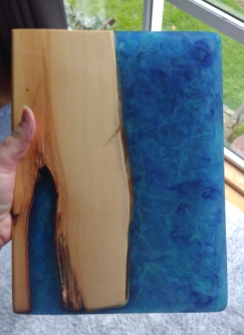
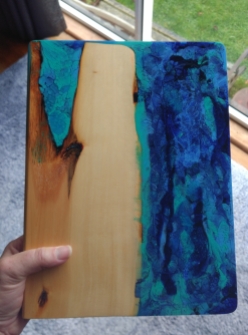
She’s finished!
Well, she still needs an Orange Oil rub down to protect her (she is at the beach after all).
To help her get to this point I just had to follow these steps:
Well, actually, there were a few more steps involved, at various non-pictured times, that went something like this:
- pour colour layer 3 – over fiddle AGAIN!
- wait 24 hours
- pour clear layer four
- wait 24 hours
- remove the sticky embrace of the plasticine – be happy that no resin seeped out
- turn her over and look at her back – be happy that only minimal resin seeped under the acrylic backing
- remove acrylic backing sheet – be happy that it released so easily
- remind self to weight down wood better next time so no resin seepage occurs
- spend some time admiring the back – colours and “worm” pattern are lovely
- regret that the front is not as nice as the back
- admire the back again

- take some photos that won’t do it justice, but you have to try
- stop procrastinating and move on to unmolding her
- remove layers and layers of tape – be happy that the tape did, indeed, keep the resin where it was supposed to be
- remove the screws at each corner
- say “there IS always one” as the last screw refuses to unscrew with the power drill
- get a hand screwdriver and give it a twist, and it comes undone easily!
- use the tip of the screwdriver to wedge the frame open in the corner
- easily remove the four frames – be happy again that the tape didn’t stick to the resin
- remind self to get more tape
- trim off the little bits of resin that went under the frame
- take more photos (because you are so impatient) even though you know she still needs a lot of sanding to finish her off properly – especially her back
- go out to the wonky workshed and get the sander out – make a mess of resin dust everywhere
- wish again that you had a dust extractor system, and a proper workshed, but then be grateful that you have a space where you can do this messy stuff – even if it is a wet, gravel floored garden shed!
- come inside to the kitchen and get the hand sandpaper out – spend the next hour hand sanding from 400 to 12 000 grit
- accept that your back and arm are not going to like you later
- apply abrasive paste and polish and hand buff some more
- take more pictures tha tyou will have to edit later – and probably discard ’cause they don’t look good enough when compared to the real thing in front of you
- fall in love a little
- be happy


Happiness is kind words from a friend …..